.avif)

Ikea Paneled Mirror Hack - How To Do It Yourself In 13 Simple Steps
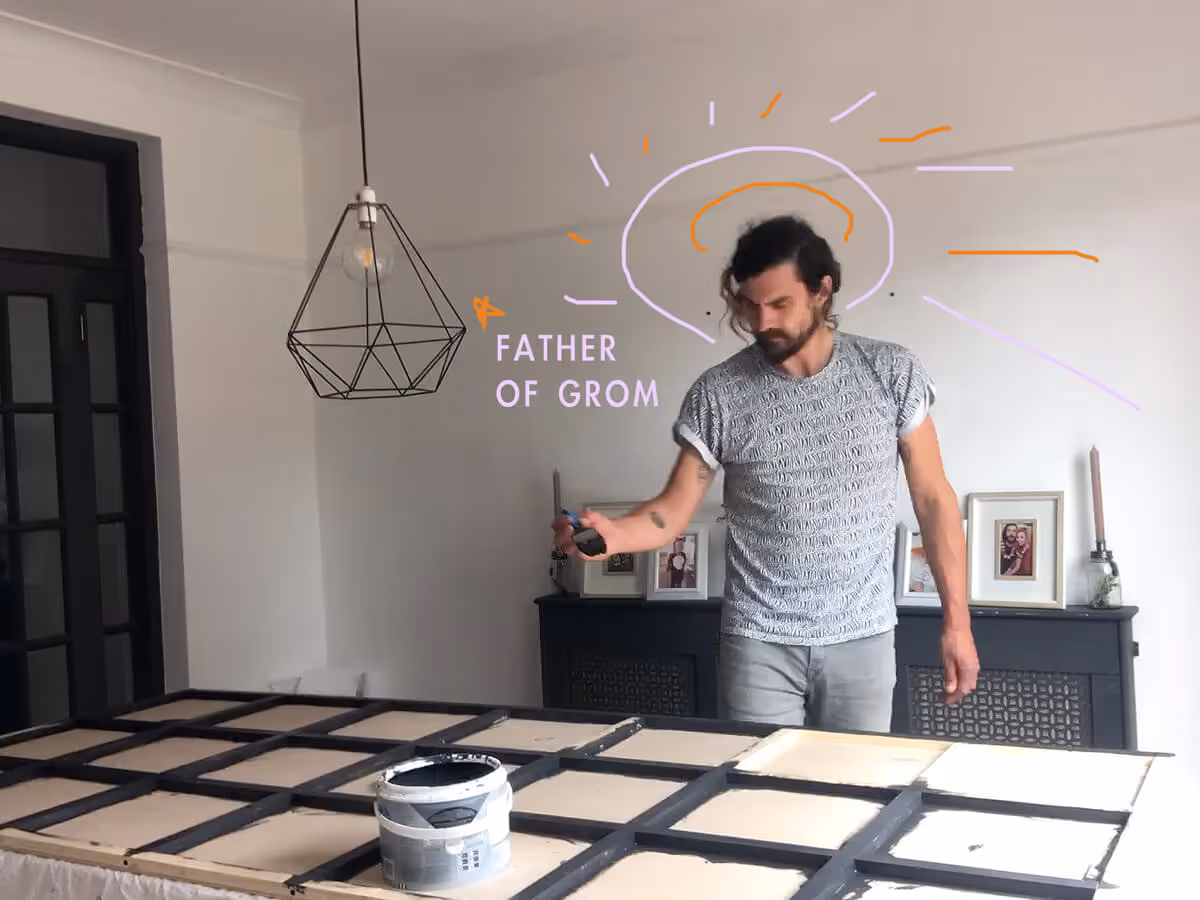
Introducing 'The Father of Grom - the Factotum' to homeschool you through the basic steps in creating one of these uber popular industrial grid, paneled mirrors in 13 steps and for under £100 | IKEA HACK | (*yes I'm a part-time hacker now)
Windowpane Mirror? Industrial Floor Mirror? Giant Panelled Mirror? Rochester Square Matrix Mirror? Ikea Grid Mirror?
Whatever you wish to call it....
Since its TIKTOK debut, it's been a storming DIY Mirror bonanza and I'm happy to introduce myself under such viral circumstances .. I'm the Father of Grom.
Oversized Interior Mirrors seem to be the new 'on point' home decor items. The Mother of Grom house (which I have been slowly chipping away at for the last 3 years) has a lovely, airy kitchen diner area but one I have always struggled to find a decorative piece for the sizeable wall that runs behind our dining table.

When I stumbled upon the rapid-edit, TIKTOK video of one of these Giant Grid Mirrors being created I was down Ikea before you could say:
Got My Own Home Show Now George Clarke!
to pick up some square Ikea 'LOTS' Mirrors.
This blog post aims to break down the process in a simple, step-by-step tutorial highlighting things to consider and materials you will need.
I opted to make mine a grid of 3 x 7 mirrors, which gave the overall mirror dimension to be 1020mm x 2330mm. So the mirror had some 'breathing room' above the radiator cover and below the dado rail.
Materials you will need for your oversized interior Ikea mirror
I have included as many things as possible that I could think of that you may need depending on the size of your mirror, your timeframe, your experience and ultimately where you will be hanging your mirror. I had quite a few of the items already in my house that I used just to keep costs down, but I have included links to items that would have been my primary choice.

Essential Items:
- 1 sheet of (12x1220x2440mm) Plywood
- 8 lengths of (18x28x2400mm) Planed Square Edged timber (PSE)
- 6 packs of Ikea 'LOTS' mirrors (300x300mm) (4 per pack)
- Fixit / modesty blocks (pack of 24)
- Farrow and Ball 'Californian Tar' off black paint
- Paintable Grab adhesive
- Masking tape 24mm x 50
- Panel pins 1.6 x 30mm
- Cartridge of Stixall Adhesive
- Sanding Sheets
Tools that make life easier
- Cross-Pein Hammer
- Folding Saw Horse / work bench tressles
- Jack Saw
- Circular Saw
- Jigsaw
- Cartridge applicator Gun
Setting up and laying out for your DIY Mirror Hack
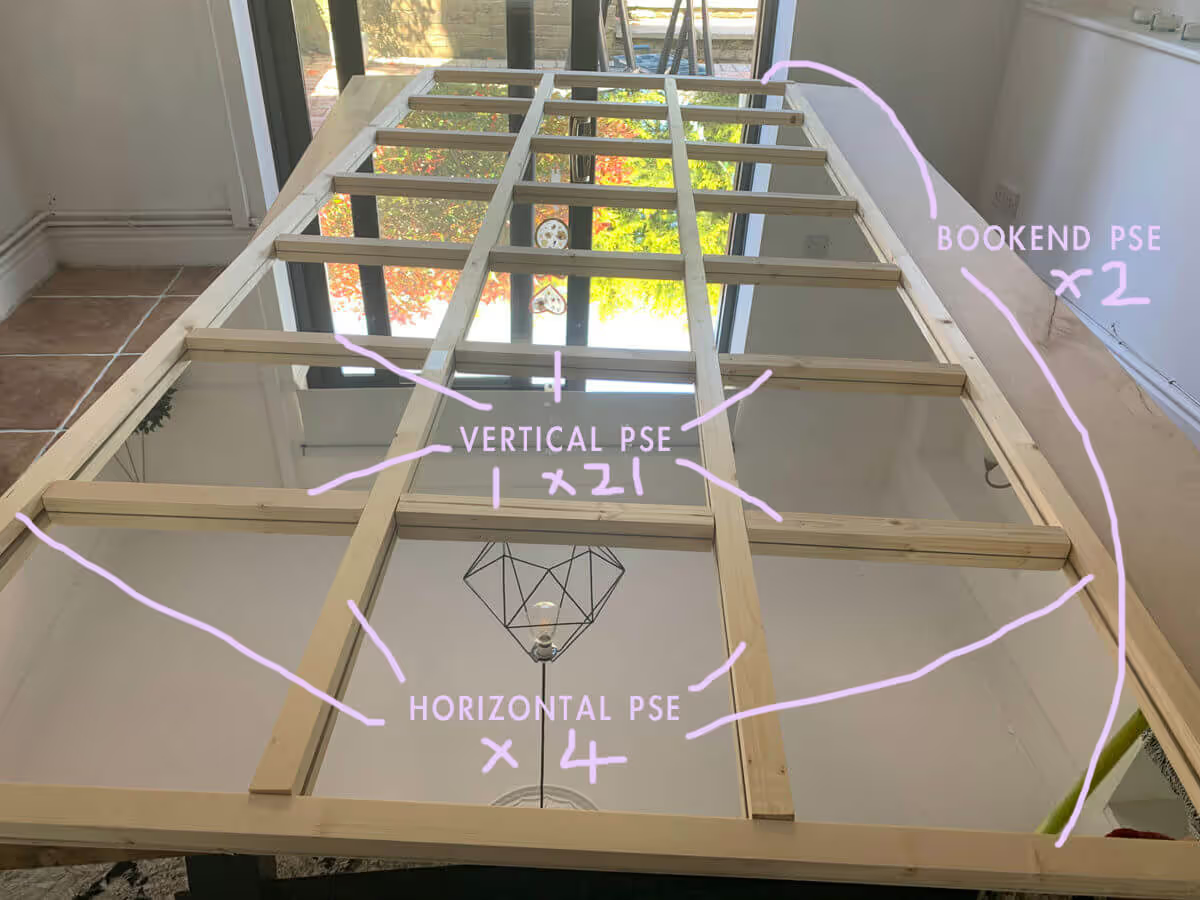
- Site plywood on a suitable surface or floor and then layout the horizontal PSE timbers along its length. (Your mirror is going to be limited by the size of the ply, if you want bigger then you are going to have to brace two sheets of ply together for the back) For my mirror, I could fit in 4 x horizontal lengths of PSE, which gave 3 rows of mirrors)
- In between the PSE timbers, layout your Ikea LOTS mirrors.
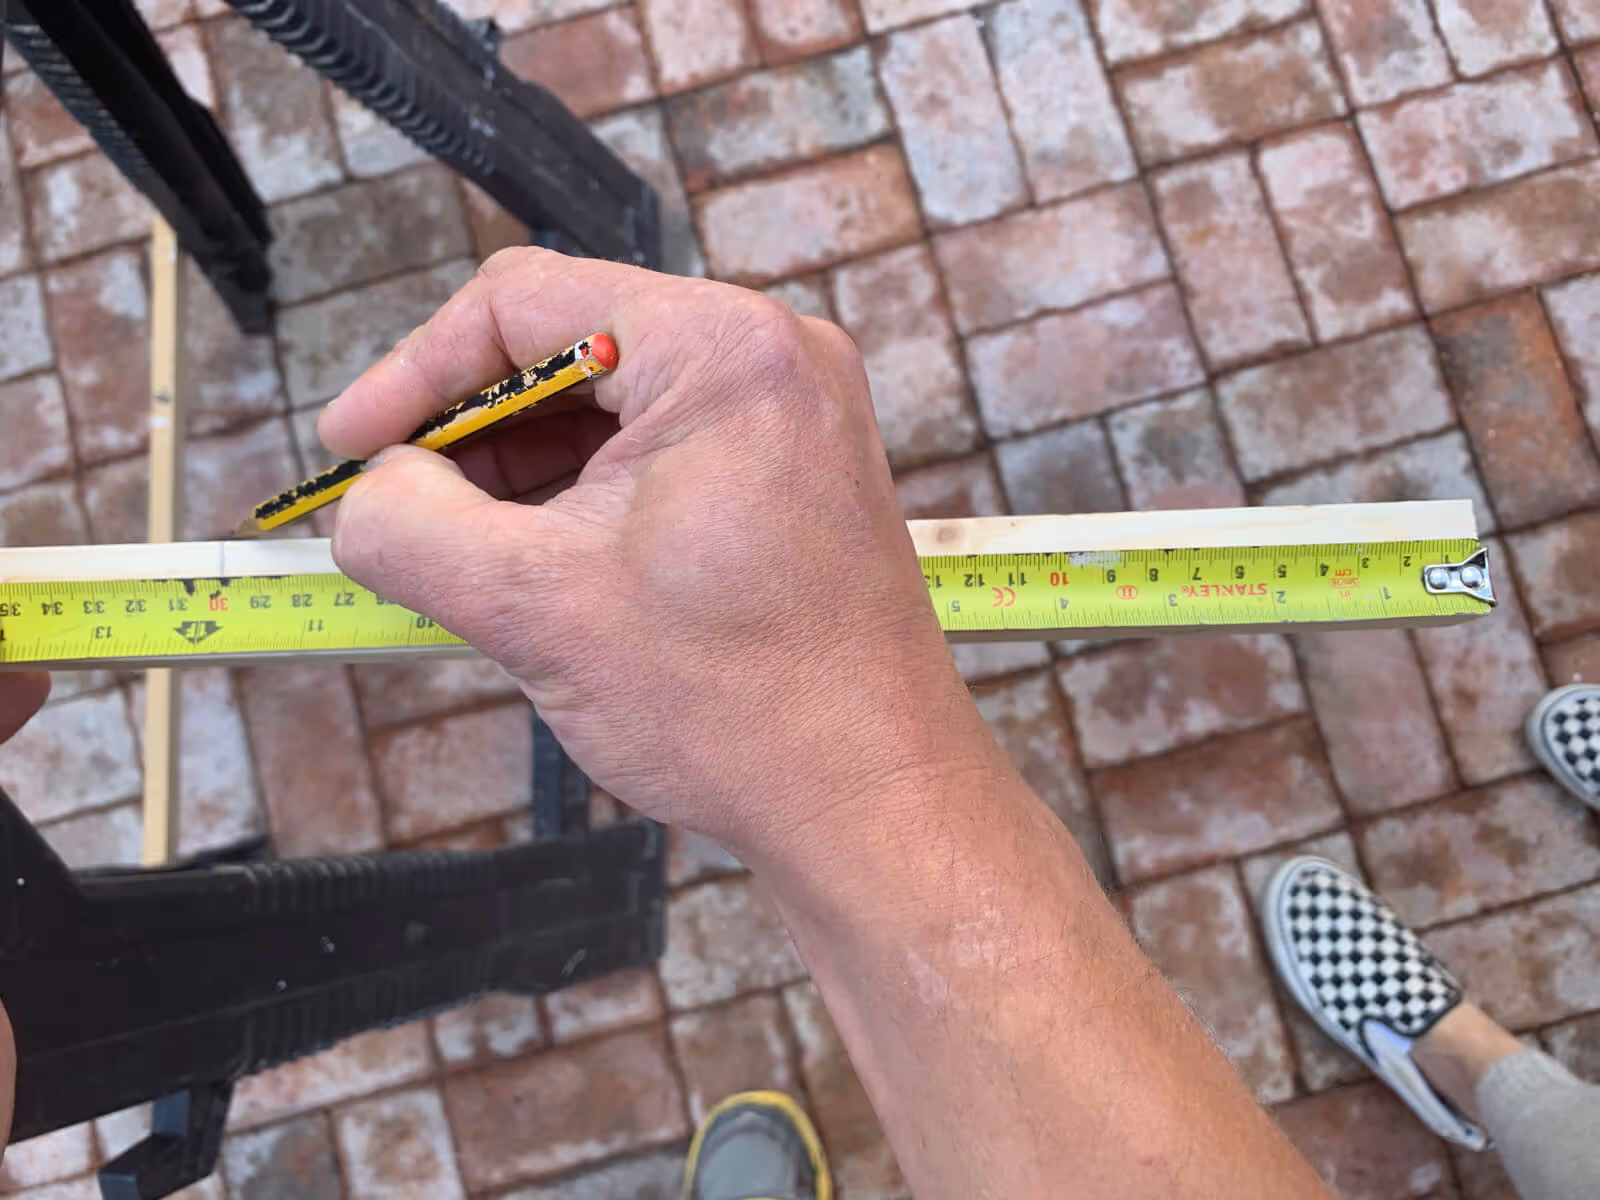
- We now need to make the vertical part of our grid. The 'dividers.' Once again these are made from the PSE timber. The LOTS mirrors are 300x300mm, so you will need to cut the PSE into 300mm lengths.
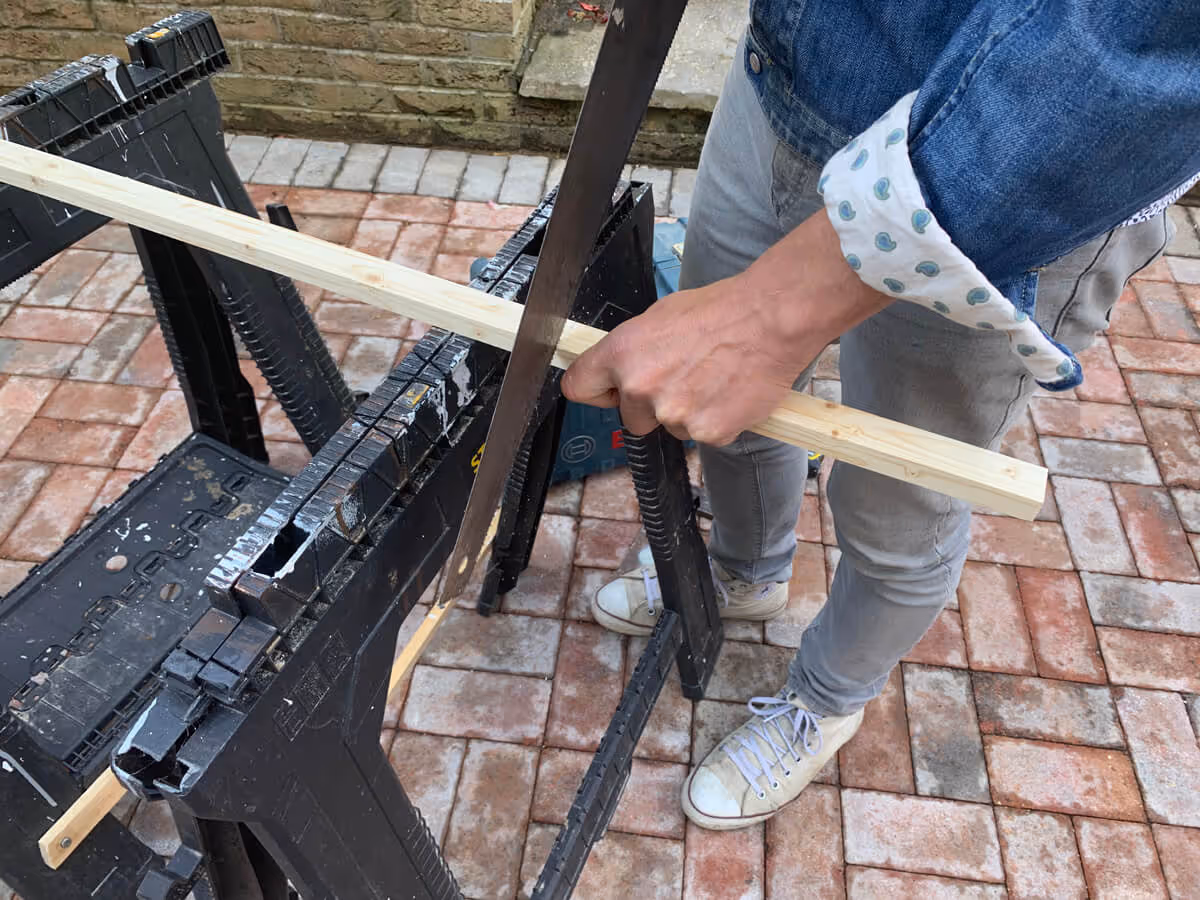
- For my mirror, I needed 18 dividers and a universal jack saw was more than sufficient for these cuts. Sand the sawn ends.

- The last two pieces of PSE timber you need to cut are the vertical end pieces (the 'book ends') For my mirror, I cut two 1018mm lengths, sanded the sawn ends, and placed them at the ends of my grid. *The math for my fellow poindexters: 300(mirror)+300(mirror)+300(mirror)+28(PSE)+28(PSE)+28(PSE)+28(PSE)+6(contingency)

- Insert your mirrors into the grid and ensure a 1mm gap around the mirrors (to allow for movement and paint application)
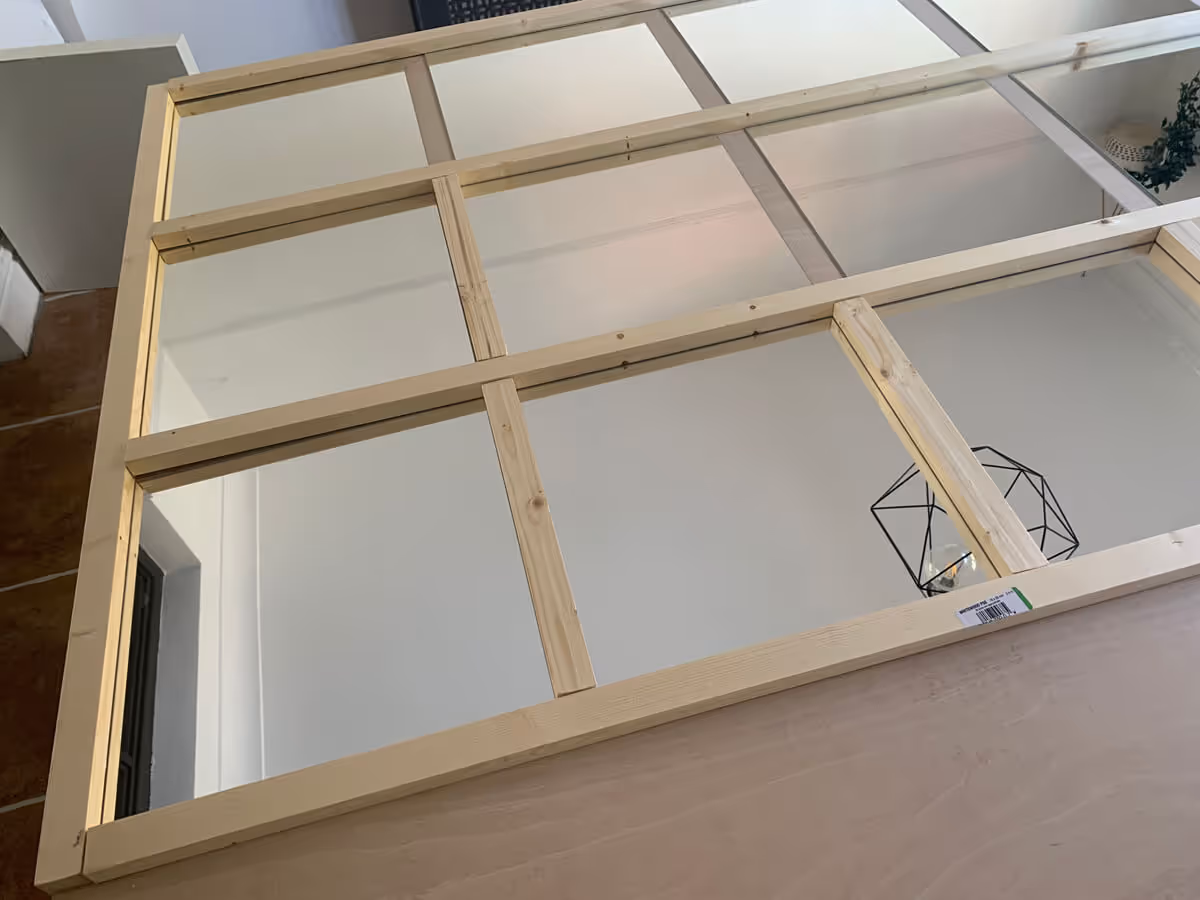
- Secure all the PSE horizontal and vertical timbers to the ply with a small bead of grab adhesive. Once dry, remove all mirrors from the grid. (They should remove easily with no resistance)

- Use the panel pins to secure all the timbers to the ply. My recommendation would be to turn the mirror over and nail the panel pins from the back, so they penetrate the ply first then the timbers.
- This will provide a more secure 'fix' and will also mean you will have no nail heads visible on the front side. *Aesthetically Winning in life!
- Trim the ply to the grid. This is far easier to do with a circular saw but can also be done with a jack saw (just take your time) or a jigsaw (just flip the mirror, transplant the 'line of cut' to the rear, and cut the ply with the mirror face down)
- Take a breather. Have a cup of CBD-infused coffee. (Yeah it does exist!) That's the hard part over.
- Now to the painting. For the DIY enthusiast with money to burn, grab a Wagner Airless Paint Sprayer. For the DIY aficionado with money to earn, grab a paintbrush. The ply where the mirrors are to go does not need to be painted, neither does the reverse of the ply. Everything else .. paint. And paint again for your second coat, leaving 2 hours drying time in between.
- Depending on the paint you use, manufacturers normally advise 7 days to fully cure. Being a dogged scofflaw - I waited for 48 hrs before inserting my mirrors.
- Now, my mirrors were a pretty secure fit into the grid (they held with no adhesive) however often with a 'great precision' comes a greater 'lack of precision' as I could not get two mirrors in (flat) after I had painted the mirror. DOH! Alas, this involved then loosening and removing the necessary PSE, planing off / nibbling a millimetre (or so), and refastening. For peace of mind, I still attached all 27 mirrors to the ply with FIXAL.
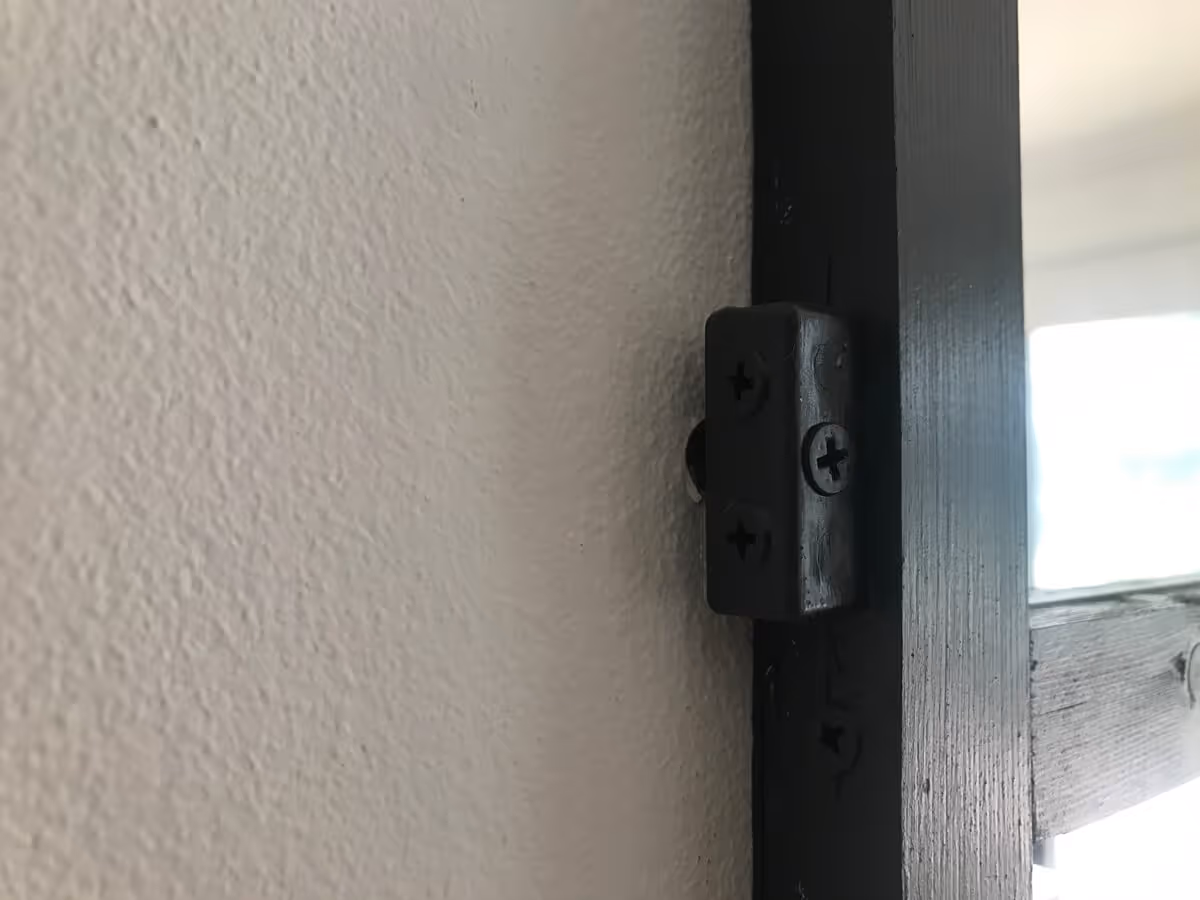
- If you (like myself) are wall-mounting your mirror ... I often use these amazing little fixit / modesty blocks to attach things together as they are relatively inconspicuous, can be painted, and remind me of some form of illegal lego cheat / hack / miracle block. For hanging this mirror I used 4 of these (one on each halfway point of the 4 sides), using smaller wood screws to attached to the mirror frame and 32mm drywall screws to attach to the rawlplugs that I had drilled into the wall.
MoG Disclaimer: Attachment to the wall will be completely dependent on the wall material (masonary, drylined etc) and the weight and dimensions of your mirror. Consider using more robust fixings if you have made yourself a mirror modeled on the 'Salar de Uyuni' (you vain human beans you!)
And that's that. finished. finito. gorffenedig. I trust you have passed with flying colours, fingers intact, and no shattered mirrors?
Please don't hesitate to contact me with any queries and I'll take any tags / shoutouts / links I can get
Father of Grom. Signing off.
I good you bid evening ._
Afterthoughts / Things to consider / Satisfying the beady-eyed:
- I used a thinner 5.5x1220x2440mm sheet of plywood as my backing board but solely as I already had one in the house. It was too flimsy for this application, as when the mirrors are in place it is a heavy item and prone to flexing. Ultimately I needed to brace the back of my ply with some batons. I would recommend what I have listed above and use a thicker sheet of 12mm ply.
- Ensure you leave 1mm gaps between the PSE timber and the mirrors. After securing them with FIXAL (even once you have nailed in the panel pins) ensure the mirrors come freely out with no resistance. Admittedly, the mirrors would be loose in the grid but can easily be secured with FIXAL, silicon, or contact adhesive and you don't then run the risk of having to remove and replace some PSE timber to plane an edge or two (which I did. DOH!)
- I used 'La Plancha' satin paint by Valspar. It's great paint. It's a smoky, nearly black (but lovely blue hued) paint that B&Q mix in stores. It's expensive - yes .. but no more so than any other top notch paint. Chemically and in it's application - it's simply an awesome paint. That said I have linked above to another excellent brand of paint and another colour that I have used on many installations. It's Farrow and Ball 'Californian Tar' and also comes highly recommended.
Share if you care ....

MoG x
Mother. Blogger. Maker. Baker.
Queen of the Sandals and Breaker of Paper Chains.

Father of Grom
Father. SEOnsai. Builder. Mugician.
Gen Xer Prancer and Breaker of Dancer.
Father of Grom
Father. SEOnsai. Builder. Mugician.
Gen Xer Prancer and Breaker of Dancer.

.jpg)


.png)